How to Make UV Resin Rings: A Beginner-Friendly Step-by-Step Guide
How to Make UV Resin Rings: A Beginner-Friendly Step-by-Step Guide
UV resin rings aren’t just beautiful—they’re seriously fun to make, even for beginners! Whether you’re into the sleek, clear look or want to add dried flowers, glitter, or bold colors, RWAtelier UV resin makes it super easy to bring your ideas to life. In this guide, I’ll walk you through everything you need to create your first resin ring—from picking the right mold to getting that perfect glossy finish.
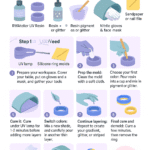
What You’ll Need
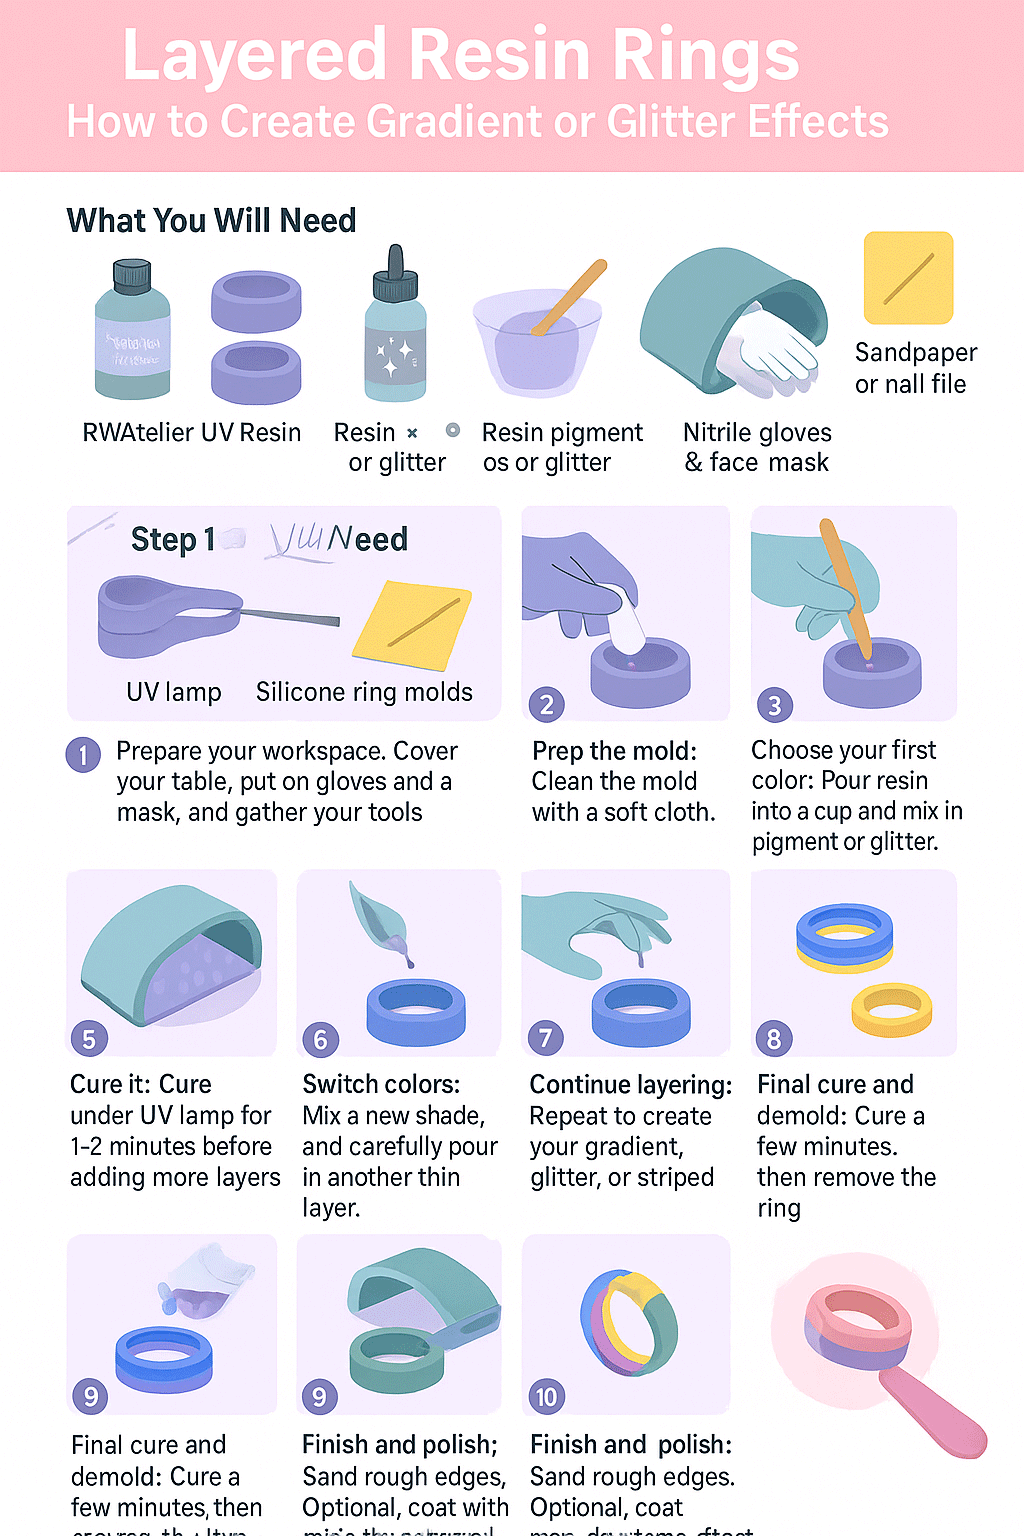
- RWAtelier UV Resin (clear or colored)
- UV lamp (24W or higher)
- Silicone ring molds (flat-top or open molds are beginner-friendly)
- Resin pigment or mica powder (optional for coloring)
- Dried flowers, glitter, gold foil (optional for decoration)
- Toothpicks or stir sticks
- Nitrile gloves and a mask
- Tweezers (for placing small elements)
- Sandpaper or a nail file (for smoothing edges)
- Clear top coat resin (optional for extra shine)
Step-by-Step: How to Make a UV Resin Ring
- Prep your space: Cover your workspace, put on gloves and a mask, and get everything ready.
- Choose your mold: Make sure it’s clean and completely dry. Flat-top or wide-band molds are easiest to start with.
- Add decorations: Use tweezers to place glitter, dried flowers, or gold foil into the mold before pouring resin.
- Mix your resin: In a small cup, add pigment or mica to the resin (if desired) and stir gently with a stick.
- Fill the mold: Slowly pour in the resin, just below the top edge to prevent overflow.
- Remove bubbles: Pop any surface bubbles with a toothpick or pass a lighter quickly over the top.
- Cure it: Place the mold under your UV lamp for 2–5 minutes, or until the resin is fully hardened.
- Demold carefully: Gently twist or press the mold to release the ring. If it’s stubborn, give it a bit more curing time.
- Smooth the edges: Use fine-grit sandpaper to soften any rough spots. For extra gloss, add a thin top coat and cure again.
- Show it off: Congrats, you made a ring! Stack it with others or gift it to someone special.
Tips for a Flawless Finish
- Work in layers when adding heavier decorations.
- Keep your mold level while curing to avoid uneven edges.
- Use transparent molds for better light penetration and more even curing.
Final Thoughts
Making UV resin rings is a fun and satisfying way to dive into the world of resin crafting. With RWAtelier’s crystal-clear, beginner-friendly resin, you’ll be creating stunning wearable art in no time. Start simple, get creative, and most importantly—enjoy the process!