How to Use Epoxy AB Glue for Strong and Clear Craft Bonding
How to Use Epoxy AB Glue for Strong and Clear Craft Bonding
Epoxy AB glue is a must-have adhesive for makers, artisans, and small manufacturers. It delivers strong, long-lasting bonds that are also visually clean and transparent. Whether you’re working with wood, metal, plastic, or resin, mastering this two-part adhesive is essential for getting professional-looking results instead of messy, cloudy finishes.
In this guide, you’ll learn exactly how to use epoxy AB glue for bubble-free, secure bonding—plus how to avoid common beginner mistakes.
🧾 Project Snapshot
- Working Time: 10–15 minutes (varies by glue pot life)
- Great For: Jewelry, crafts, wood inlays, glass repair
- Skill Level: Beginner-friendly
🔬 What Is Epoxy AB Glue?
Epoxy AB glue consists of two components:
- Part A: Epoxy resin
- Part B: Hardener
When mixed in the correct ratio (usually 1:1 or 2:1), they chemically react to form a hard, durable material suitable for structural or clear craft bonding.
🛠️ How to Use It Properly
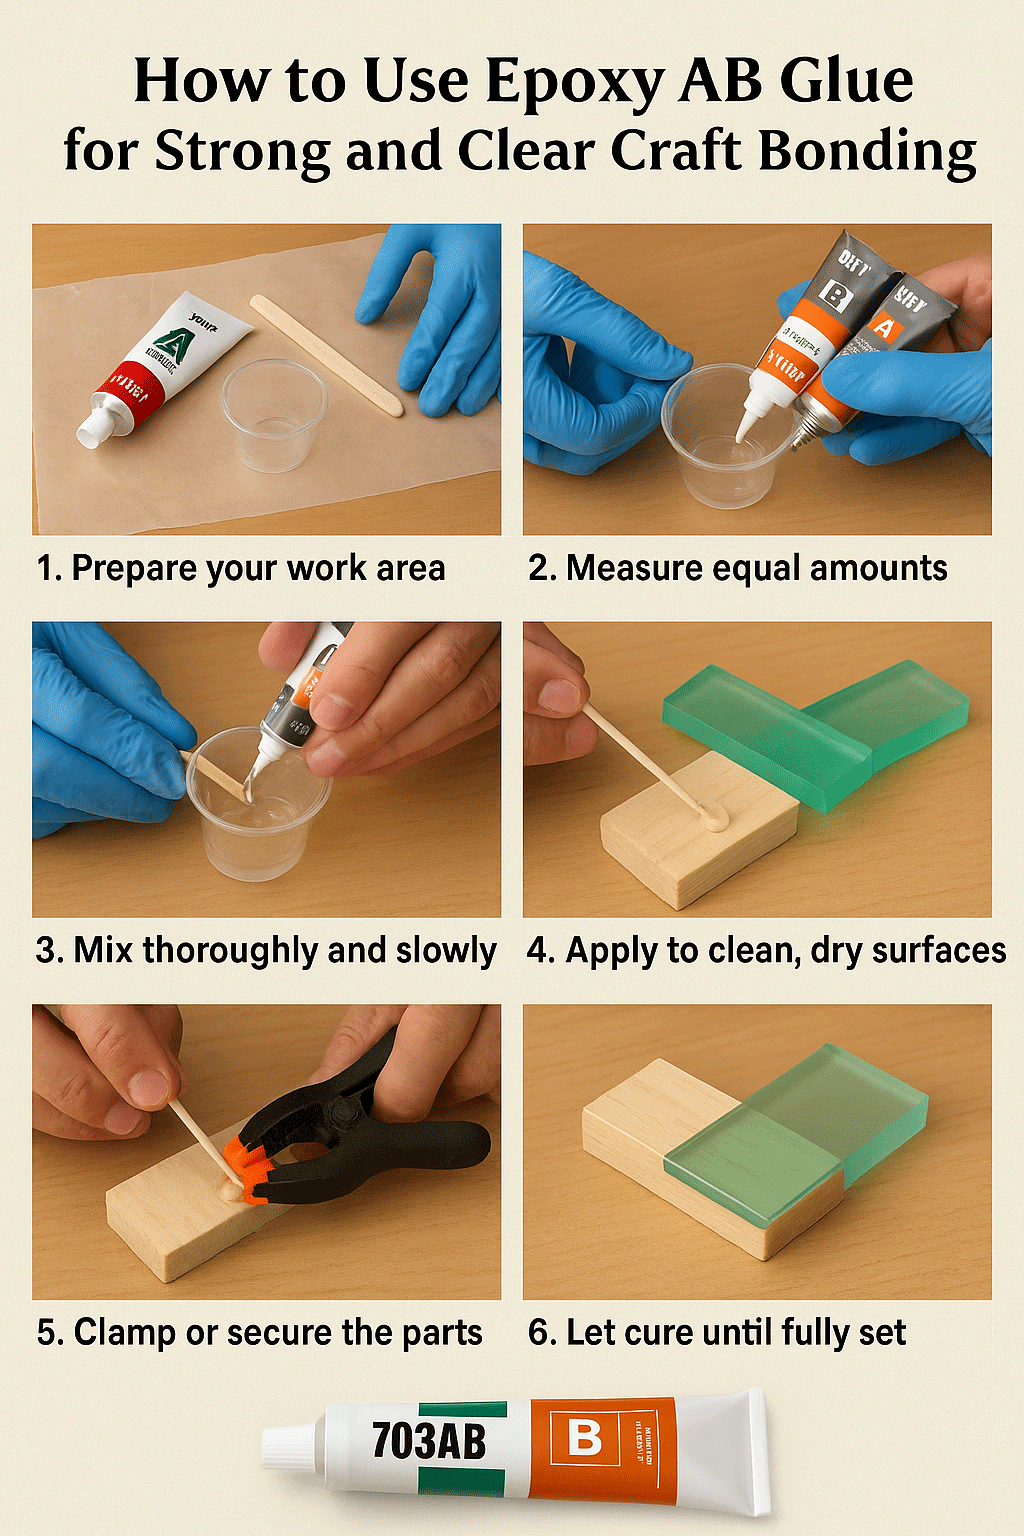
1. Prepare Your Workspace
Work in a clean, ventilated, dust-free area. Protect surfaces with PE film or silicone paper. Have gloves, mixing cups, and tools ready.
2. Measure Precisely
Use separate cups to measure equal parts A and B (usually 1:1 by volume). Double-check your product label for the correct ratio.
3. Mix Thoroughly—but Slowly
Stir slowly for at least 2–3 minutes, scraping the sides and bottom. Let the mixture rest for 1–2 minutes to release air bubbles before application.
4. Apply to Clean, Dry Surfaces
Use a spatula or toothpick to apply a thin, even coat. Lightly sand smooth surfaces for better adhesion. Make sure everything is dry and oil-free.
5. Clamp or Secure
Gently clamp the pieces together. Avoid pressing too hard—leave space for the glue. Don’t disturb during curing.
6. Let It Cure Completely
Standard epoxy glues cure in 24–48 hours. Fast-cure types may harden in 5–15 minutes but still need more time to reach full strength.
📌 Tips for Clear & Strong Bonding
| Tip | Why It Matters |
|---|---|
| Use correct ratio | Ensures proper curing and strength |
| Mix slowly | Prevents bubbles |
| Warm, dry environment | Improves clarity and flow |
| Don’t move during cure | Prevents whitening or failure |
| Seal porous materials first | Prevents weak absorption spots |
❌ Common Mistakes and Fixes
| Mistake | Result | Fix |
|---|---|---|
| Mixing by eye | Sticky or brittle finish | Measure properly with cups or syringes |
| Stirring too fast | Bubbles inside resin | Mix gently for at least 2–3 minutes |
| Applying to wet/oily surfaces | Poor adhesion | Clean with alcohol and dry completely |
| Moving during curing | Weak joints, foggy bond | Leave untouched until fully cured |
| Not checking pot life | Glue hardens in the cup | Work in small batches |
🧪 Which Epoxy AB Glue Should I Choose?
Here are some recommended models from our catalog to help you choose the best option for your application:
| Product | Best For | Key Features |
|---|---|---|
| 315AB | Jewelry, keychains, small decorative items | Soft-cure feel, high clarity, flexible after cure |
| 703AB | Metal, wood, rigid bonding | High-strength, industrial-grade, excellent adhesion |
| 1608AB | Surface finishing, dome coating | Crystal clear, smooth self-leveling, bubble-free |
| 5050AB | Moisture exposure, electronics, crafts with UV resistance | Anti-yellowing, chemical-resistant, tough coating |
| 4212AB | Shallow casting, flat gluing | Glossy finish, firm yet non-brittle, great for pendants |
Need help choosing? Contact us or browse our full Epoxy AB Glue Collection.
📷 Suggested Visuals
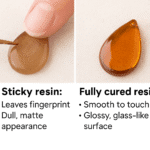
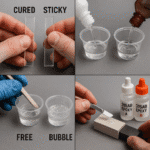
- Clear bond vs. tacky failed bond
- Measuring cups showing proper ratio
- Bubble-free vs. overmixed glue close-up
- Application on wood, plastic, and metal
✅ Final Thoughts
With proper preparation, epoxy AB glue is one of the most reliable adhesives for creating clean, durable, and transparent results. Focus on accurate measuring, gentle mixing, and patient curing—and you’ll unlock professional-level finishes from your own workspace.