How to Craft Layered UV Resin Jewelry with Dried Flowers
How to Craft Layered UV Resin Jewelry with Dried Flowers
There’s something magical about sealing tiny dried flowers into layers of crystal-clear resin. Each piece feels like a little time capsule, holding something soft and delicate forever. But if you’ve ever tried layering UV resin, you probably know—it’s not always smooth sailing. Flowers float, bubbles sneak in, and depth can get weird real fast.
In this guide, I’ll take you through the full process, step by step—so your piece turns out dreamy, not drippy.
🛠️ Project Snapshot
- Estimated Time: 45–60 minutes (not counting flower-drying time)
- Difficulty: Beginner-friendly, but a bit of patience helps
- Great For: Necklaces, earrings, pendants, keychains
🌼 What You’ll Need
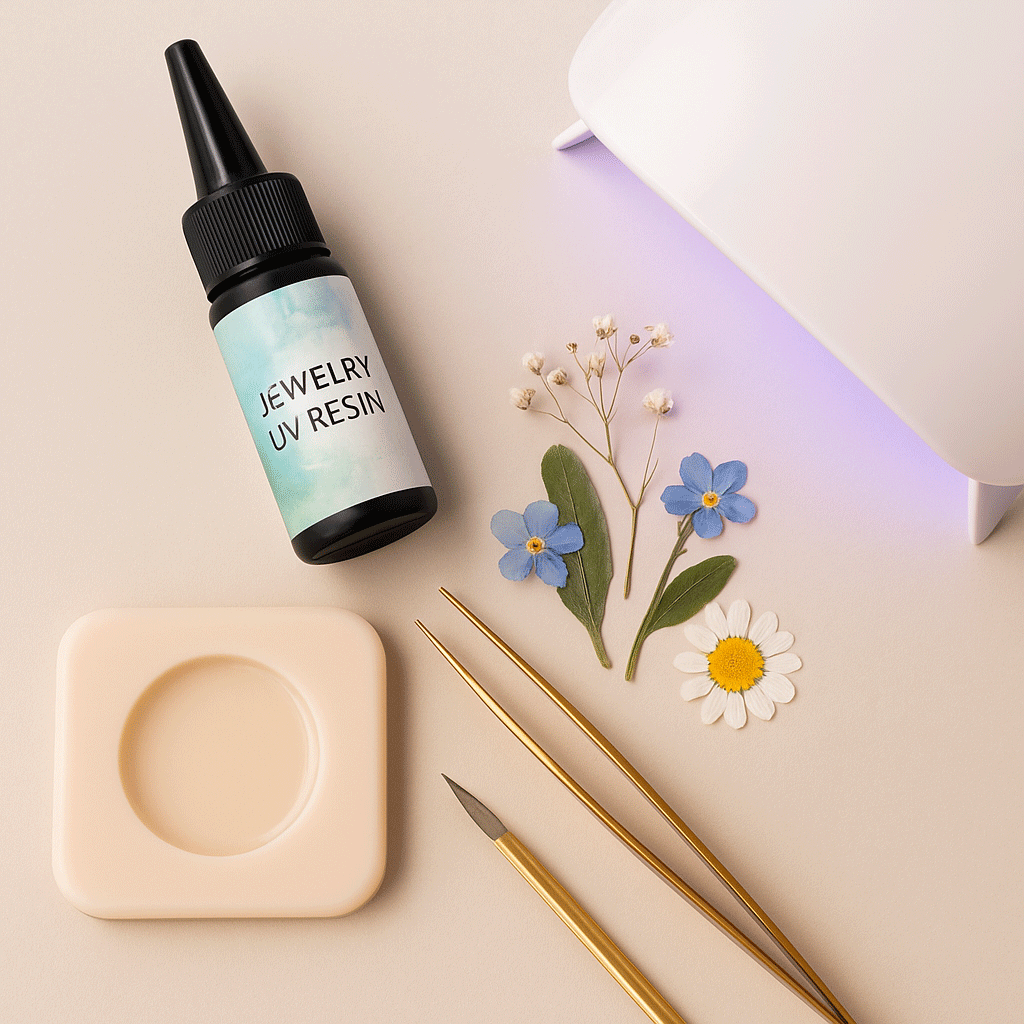
- Clear UV resin (jewelry-grade)
- Fully dried and pressed flowers (flat and small work best)
- Silicone mold (transparent if possible)
- UV lamp (36W or higher)
- Toothpick or resin stick
- Fine tweezers
- Optional: background pigment, glitter, doming resin for the final coat
🔍 Step-by-Step Guide
1. Prep Your Flowers
Start with flowers that are flat and completely dried—baby’s breath, daisies, forget-me-nots all work beautifully. If you’re pressing them yourself, use parchment paper and heavy books for at least 7 days.
💡 Avoid fresh or thick flowers—they hold moisture and often brown or float in resin.
2. Pour the Base Layer
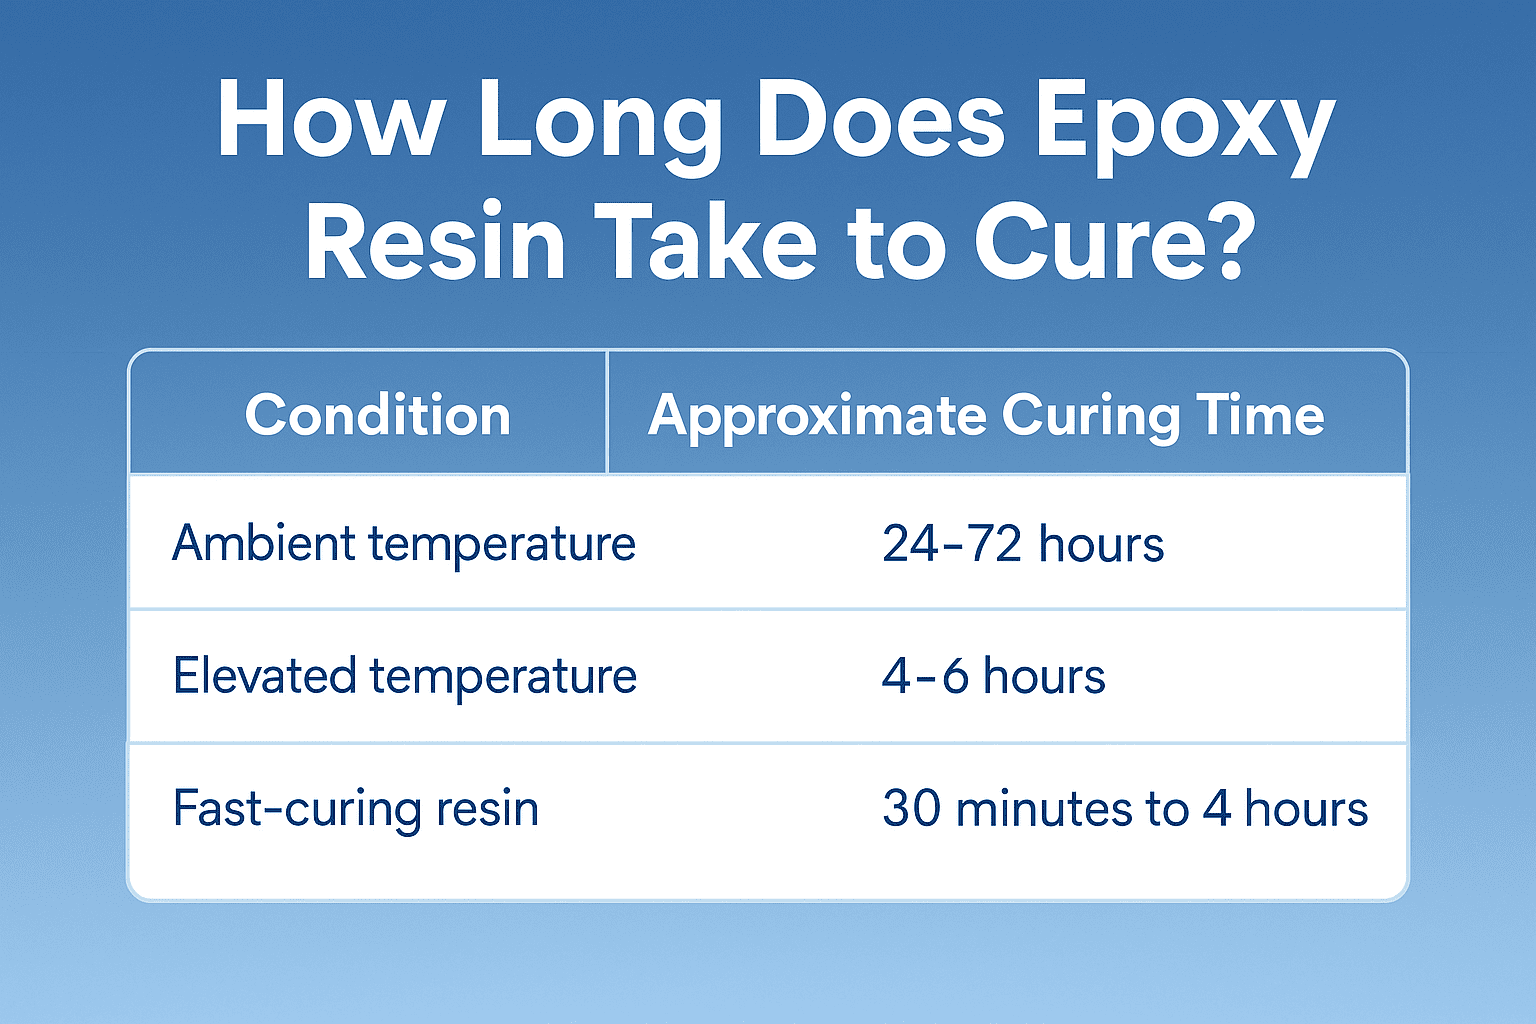
Add a thin layer of UV resin to your mold, just enough to cover the bottom. Cure under a UV lamp for about 30 seconds, so it’s slightly tacky.
This helps your flowers stay in place and prevents them from sinking all the way down.
3. Add Your First Flower Layer
Pour a very thin layer of resin over the base—don’t cure it yet. Use tweezers to gently place your dried flowers. Tap around the edges with a toothpick to release trapped air.
✨ Pro tip: A tiny bit of resin on your tweezers can help you “pick up” and guide delicate petals.
Once everything’s in place, flash cure for 10–15 seconds to lock the flowers in.
4. Build More Layers for Depth
Repeat the process:
- Thin resin layer
- Add more flowers or petals
- Flash cure
- Add another layer
- Full cure if needed
Usually, 2–3 layers are enough to give your piece that lovely “floating in space” effect.
⚠️ Too much resin at once will make flowers float or shift. Take your time—let each layer settle.
5. Finish with a Domed Top Layer
Once your flower design is complete, pour a thicker resin layer on top for that domed, glassy finish. Cure fully for 2–3 minutes.
If the surface feels a little sticky after curing, a quick wipe with isopropyl alcohol will help.
6. Demold and Add Finishing Touches
Gently remove your piece from the mold. If the edges are sharp, sand them down a bit. You can add a final glossy top coat if you want it ultra-shiny.
🎀 Optional: Add necklace chains, earring hooks, or keyrings—your piece is ready to wear or gift!
| Problem | What Went Wrong | How to Fix It |
|---|---|---|
| Flowers floated | Resin layer too thick or uncured base | Always semi-cure the base before layering |
| Bubbles near petals | Flowers not flat or no air tapped out | Use flat flowers + tap with toothpick |
| Yellowing or fading | Flowers not fully dried or overcured | Use pressed flowers + quality resin |
| Uneven surface | Mold wasn’t level or curing was uneven | Keep mold flat + dome evenly |
📸 Suggested Photos for Your Blog Post
- Dried flowers arranged next to a clean silicone mold
- Resin curing under a UV lamp (with the first layer in progress)
- Tweezers placing a small flower into uncured resin
- Final domed jewelry piece with dried flowers visible in layers
🌷 Final Thoughts
This project is like slow magic. Each flower you seal in becomes part of a little world frozen in time. Once you try it, it’s hard to stop—you’ll find yourself looking at every tiny bloom and thinking, could this go in resin?
Take your time, enjoy the process, and let your creativity bloom—layer by layer.