How to Craft Stronger UV Resin Jewelry That Won’t Crack or Bend
How to Craft Stronger UV Resin Jewelry That Won’t Crack or Bend
Ever made an eye-catching UV resin pendant, only for it to snap after a few days? Or maybe your earring softened up in the heat? Don’t worry—UV resin is beautiful, but it can be a little fragile if not handled correctly. Thankfully, there are simple ways to make your jewelry more durable and long-lasting.
This guide breaks down the most common reasons your resin might be weak—and how to fix them with beginner-friendly techniques.
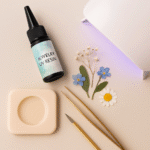
🧾 Project Snapshot
- Estimated Time: 30–45 minutes (depending on mold size)
- Difficulty: Beginner-friendly, with attention to detail
- Ideal For: Jewelry makers looking to improve product quality
💥 Why Does UV Resin Jewelry Break or Bend?
Let’s take a look at what might be going wrong when your jewelry isn’t as strong as it should be:
| Problem | Likely Cause |
|---|---|
| Bends or warps easily | Resin not fully cured or piece is too thin |
| Cracks from small impacts | Brittle resin or mold is too shallow |
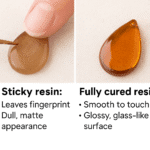
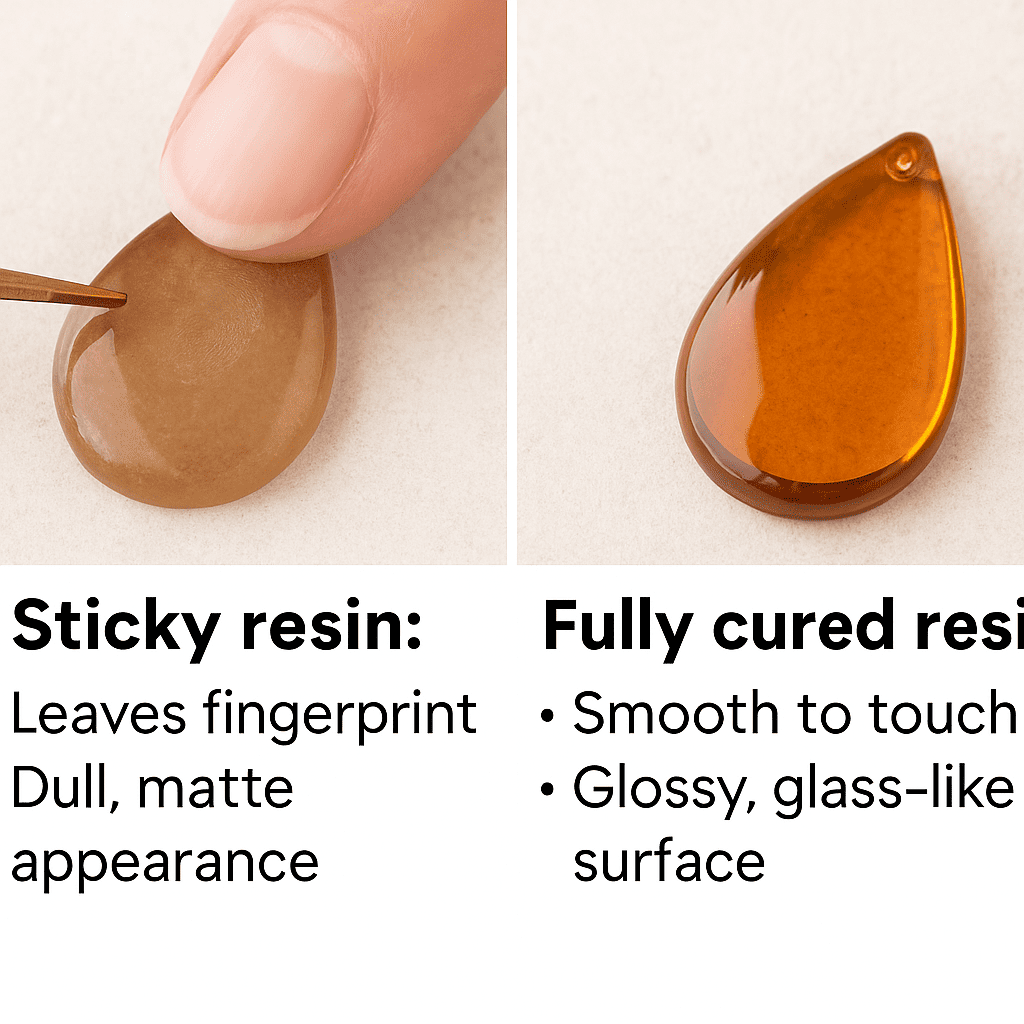
| Sticky surface | Under-cured or poor-quality resin |
| Yellowing or softening over time | UV overexposure or poor sealing |
🔧 6 Tips to Make Stronger UV Resin Jewelry
1. Use High-Quality UV Resin
Not all UV resins are created equal. Lower-quality options may cure soft or yellow quickly. Choose resins labeled as “hard type” or with a Shore hardness rating of 70D or higher for better strength.
Tip: If you live in a humid climate, go for resins with strong anti-yellowing properties.
2. Apply Thin Layers Instead of One Thick Pour
Thick pours may look clear but can stay soft inside. Build your piece gradually with layers around 1–2mm thick, curing each layer completely before moving to the next.
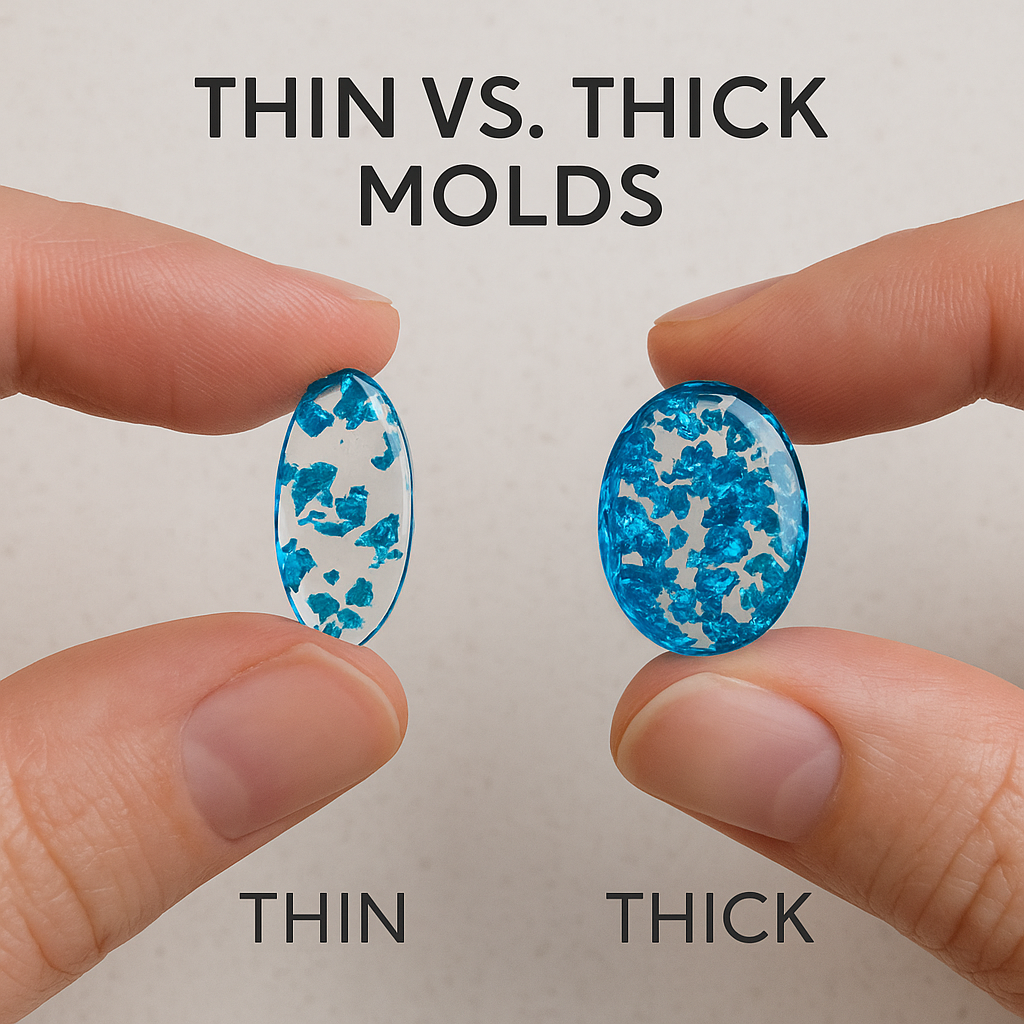
3. Choose the Right Mold Depth and Shape
Very thin molds (like 1mm) are more likely to bend or crack. Use molds at least 3–4mm deep for anything you expect to wear or carry around.
Bonus: Rounded shapes (like ovals or circles) tend to hold up better than sharp-edged designs.
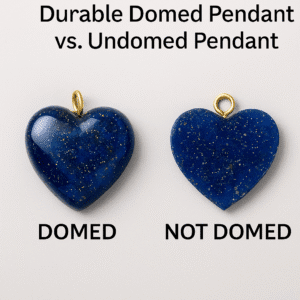
4. Add a Doming Layer for Extra Strength
After curing your design, add a final layer of resin on top to dome the surface. This gives your piece extra shine—and more structural integrity. It’s especially helpful for flat pieces like pendants or charms.
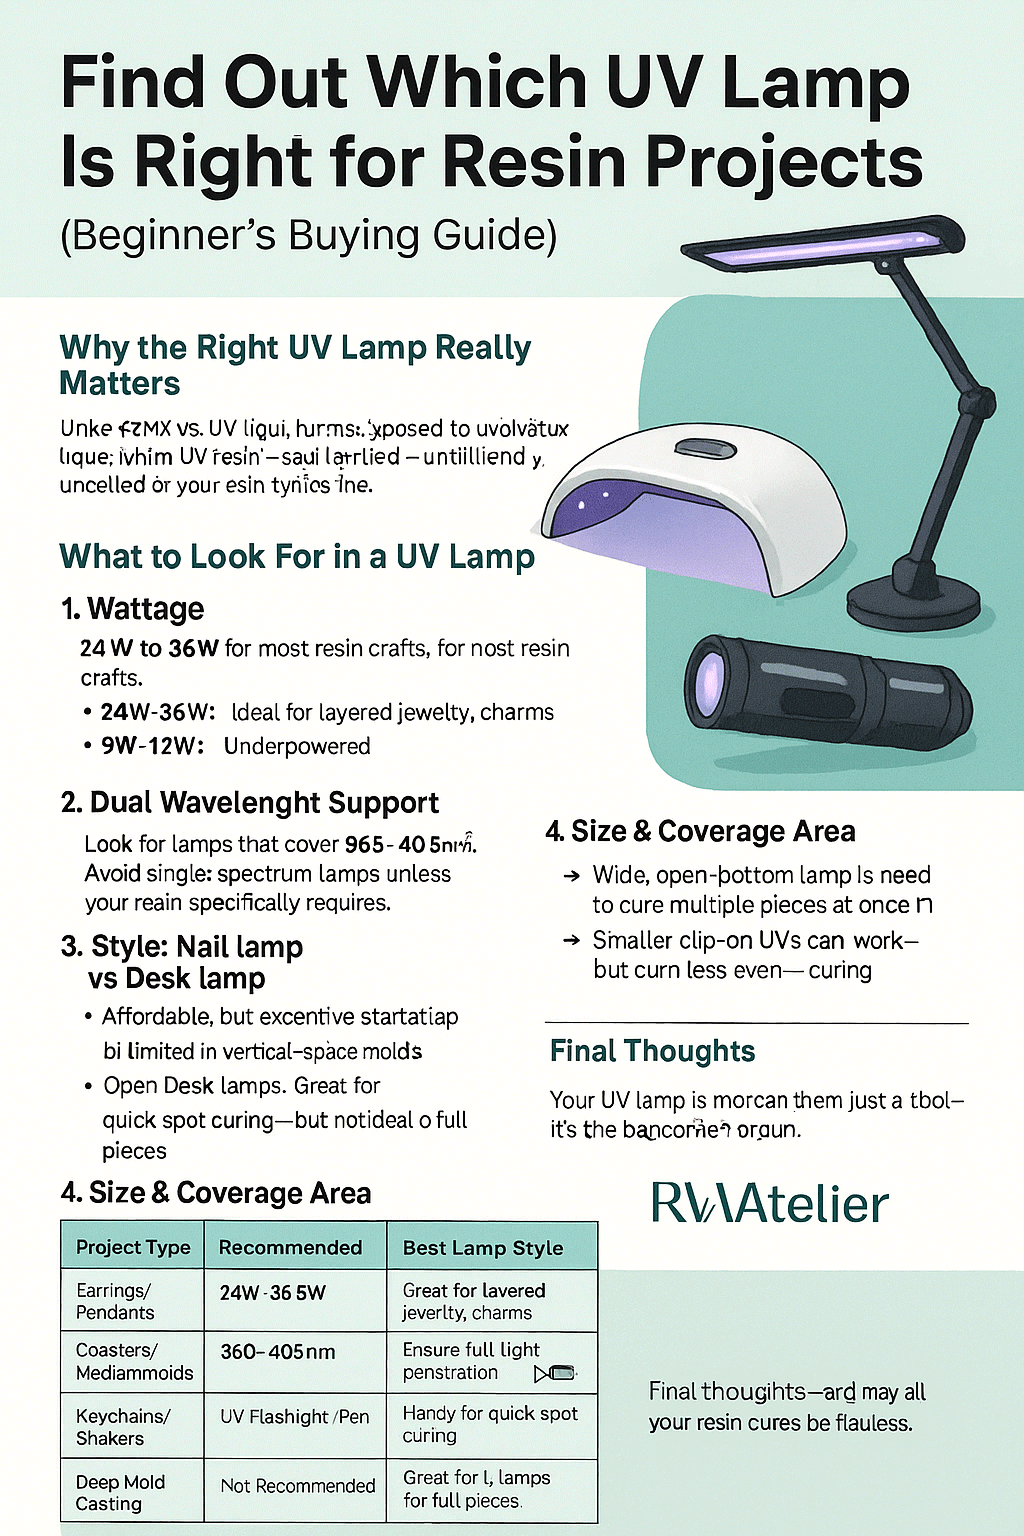
5. Use a Strong UV Lamp—and Cure Long Enough
Low-power nail lamps (under 24W) might not cure your resin completely. Aim for at least a 36W UV lamp and cure each layer for 2–4 minutes depending on its thickness. Rotate the piece if needed to ensure even exposure.
6. Reinforce with Findings or Frames
If you’re working on thin earrings, rings, or pendants, consider embedding your resin in metal bezels or open-back frames. They not only add strength but give your work a professional look.
⚠️ Common Mistakes (and How to Prevent Them)
| Mistake | What Happens | Better Approach |
|---|---|---|
| Pouring resin all at once | Uncured or soft center | Work in thin layers |
| Using shallow molds | Breaks easily | Use deeper molds for strength |
| Curing too quickly | Brittle finish | Cure longer with a strong lamp |
| Skipping the dome coat | Edges chip or snap | Add a final protective layer |
📸 Suggested Visuals
- Side-by-side: thin vs thick mold results
- Cross-section showing uncured center of thick pour
- Domed vs undomed pendants after durability test
- Ring with and without metal bezel (before/after crack)
🌟 Final Thoughts
Stronger doesn’t mean bulkier. With just a few tweaks—like smarter layering, proper curing, and using the right molds—you can make UV resin pieces that are both delicate and durable.
And if something still breaks? Don’t toss it. Turn it into something new. That’s part of what makes handmade jewelry so creative—and fun.