How to Layer UV Resin Without Bubbles or Shifting
How to Layer UV Resin Without Bubbles or Shifting
A Beginner-Friendly Guide for Smooth, Clean Resin Projects
Layering UV resin offers endless creative opportunities, from dreamy gradients and embedded dried flowers to glitter effects with multiple layers. But dealing with trapped bubbles or shifting elements can be frustrating. With a little patience and some simple techniques, you can achieve professional-looking results with RWAtelier UV Resin.
What You’ll Need:
- RWAtelier UV Resin (clear or tinted)
- UV lamp (24W or higher)
- Transparent or semi-transparent silicone molds
- Resin pigment, mica powder, or alcohol ink
- Optional: glitter, dried flowers, foil flakes, stickers
- Toothpicks, stir sticks, and disposable cups
- Tweezers
- Isopropyl alcohol (in a spray bottle)
- Nitrile gloves and face mask
- Silicone mat or wax paper to protect your work area
Step-by-Step Instructions:
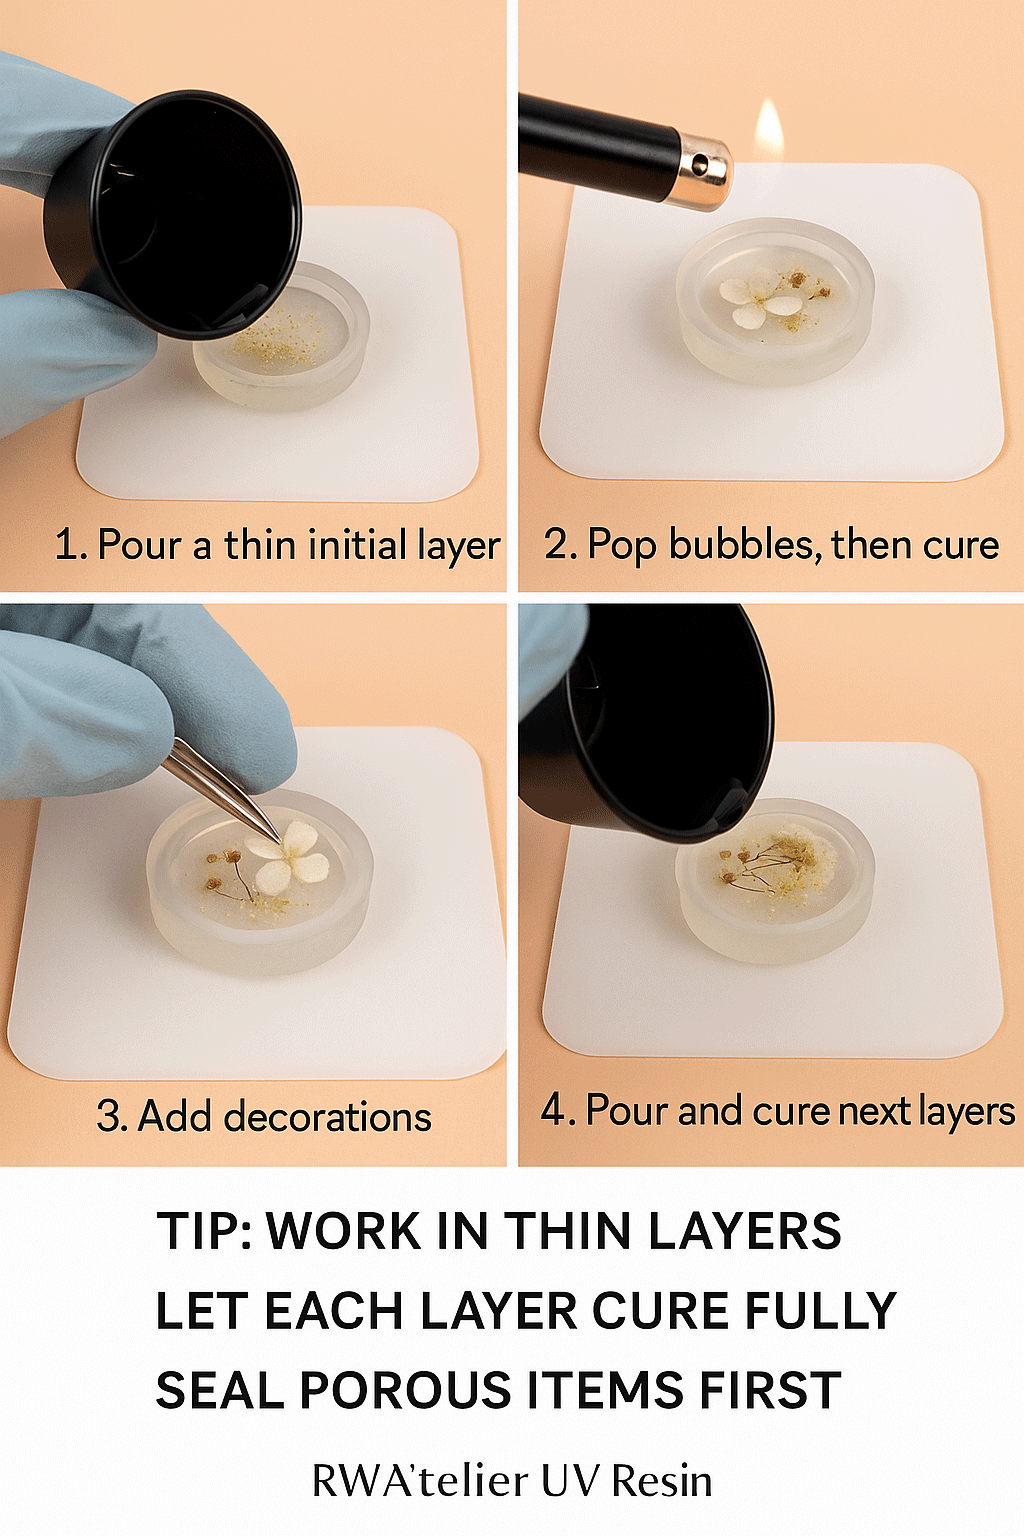
- Prep Your Workspace: Cover your surface, wear gloves and a mask.
- Pour the Initial Thin Layer: 1–2mm of resin, this minimizes trapped air.
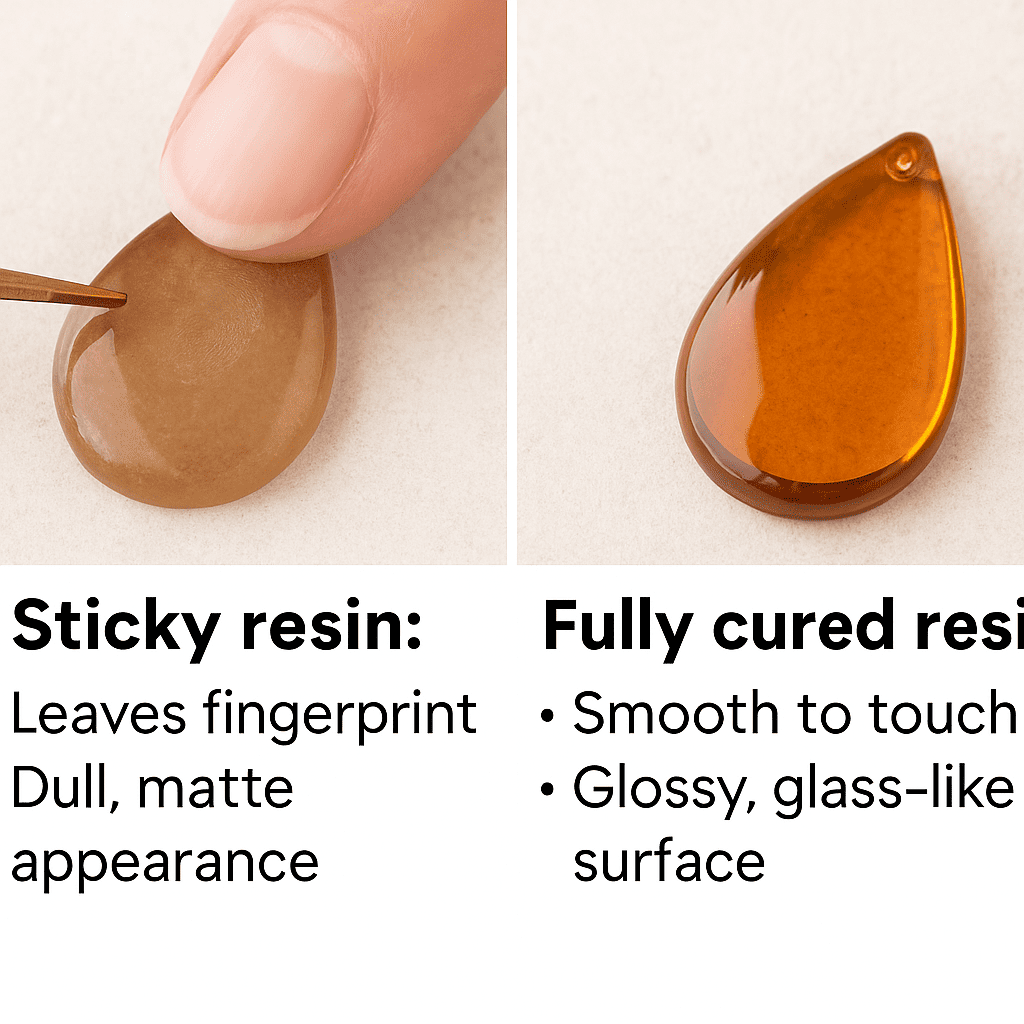
- Pop Bubbles: Use a toothpick, lighter, or alcohol spray before curing.
- Cure the First Layer: Under UV for 2–3 minutes until fully hardened.
- Add Decorations: Use tweezers to place items flatly. Add a drop of resin if needed to seal before curing again.
- Slow Resin Pour: Pour near the surface gently to avoid displacing elements.
- Continue Layering: Cure each layer before adding another.
- Optional Top Coat: Add a dome layer for shine and cure again.
Tips to Prevent Bubbles or Shifting
- Work in thin layers (1–2mm).
- Let resin rest 30–60 seconds before curing.
- Seal paper or flowers before embedding.
- Use transparent molds for better curing.
- Avoid overhandling the decorations.
Creative Ideas
- Galaxy glitter with black and mica layers.
- Dried flower arrangements in layered rows.
- Translucent + opaque color contrast for depth.
Common Mistakes
- Adding a new layer before the last is cured.
- Overfilling the mold, losing the domed finish.
- Too much pigment blocking UV light.
Final Thoughts
With RWAtelier UV Resin and careful technique, you’ll create clean, layered resin art that looks polished and professional. Start with small batches and enjoy the process!


Related Posts
Why Is My UV Resin Sticky After Curing? Causes &...
How to Craft Stronger UV Resin Jewelry That Won’t Crack...
