
Hand Layup Carbon Fiber Guide with Wet Layup Epoxy Resin
Understanding Hand Layup and Wet Layup Process
What is Hand Layup: Process, Pros, and Cons
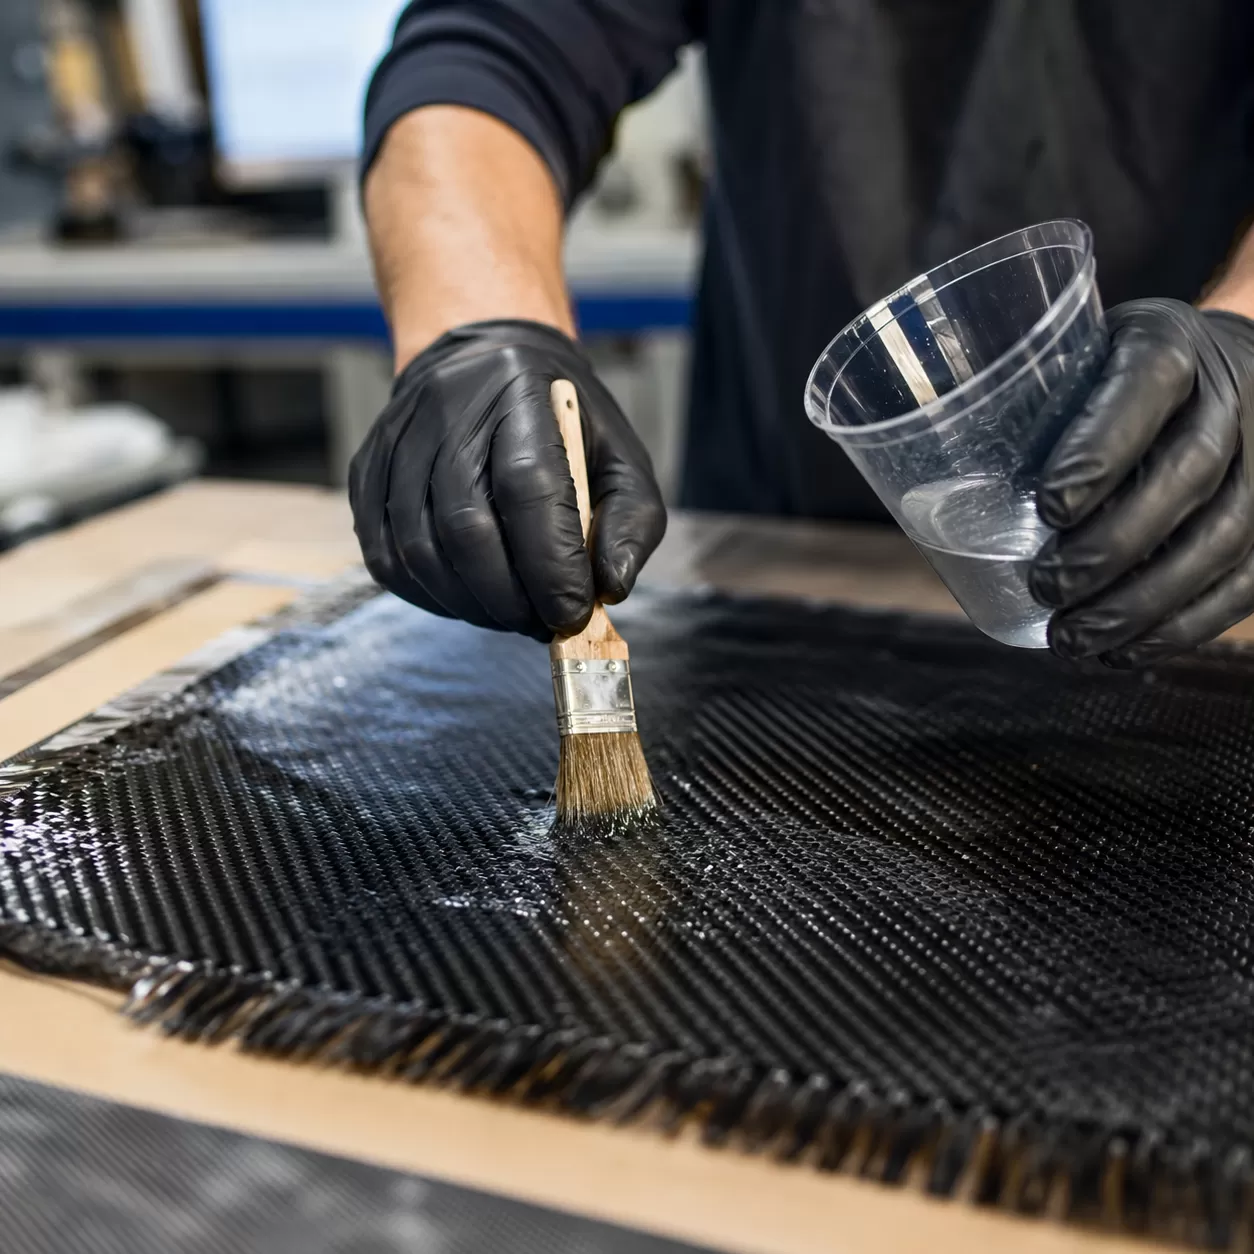
The hand layup carbon fiber process, also known as manual fiber layup or composite hand lamination, remains a foundational technique in the composites industry. The workflow is straightforward yet precise: a mold is prepared, dry fiber reinforcement is placed manually, and a liquid resin system is applied using a brush application epoxy technique or rollers to ensure thorough fiber saturation.
[Mold Preparation] ➔ [Fiber Placement] ➔ [Resin Application] ➔ [Consolidation/Debubbling] ➔ [Curing]
- Advantages: Low initial tooling costs, virtually no machinery requirements, and an incredibly short setup time. It allows for rapid prototyping and design iterations without heavy capital investment.
- Disadvantages: It is highly dependent on operator skill. Achieving a consistent fiber-to-resin ratio is challenging, which can lead to higher part-to-part variability compared to automated processes.
Why It Remains Widely Used: Low Cost and High Flexibility
Despite the rise of automated manufacturing, the wet layup process continues to dominate global composite fabrication. The primary drivers are its unmatched economic efficiency and manufacturing agility.
- Minimal Capital Expenditure: Eliminates the need for expensive autoclaves, automated tape layers, or heated presses.
- Design Agility: Changes in part geometry can be implemented instantly on the shop floor by modifying the layup mold preparation or adjusting the fabric tailoring.
- Material Compatibility: Works seamlessly with various fiber formats, from woven carbon fiber to chopped strand mats, utilizing the same basic toolset.
Ideal Applications: Small Batch, Customization, and Complex Shapes
The hand lamination technique is uniquely positioned for specific manufacturing demands where automated methods fail to be cost-effective.
| Application Type | Key Requirements | Why Hand/Wet Layup Excels |
|---|---|---|
| Small-Batch Production | Low overhead, fast turnaround | Avoids the massive setup costs and programming time of automated systems. |
| High-End Customization | Bespoke designs, variable thicknesses | Operators can precisely tailor local reinforcements by adding extra fiber plies exactly where stress analysis demands. |
| Complex Geometries | Deep draws, tight radii, compound curves | Experienced laminators can manipulate and drape dry fabric into intricate mold contours that would cause automated rollers to wrinkle or tear the fiber. |
Key Steps in the Hand Layup Carbon Fiber Process
Mastering the wet layup epoxy resin process requires precision at every stage. Getting high-quality composite parts depends on a clean, disciplined execution from preparation to final demolding.
Layup Mold Preparation & Release Agent
Everything starts with the mold surface. Any imperfection here will transfer directly to your finished part.
- Cleaning: Scrub the mold surface to remove dust, oil, and previous resin residue.
- Waxing: Apply a high-quality paste wax and buff it out. Repeat for 3–5 layers on new molds.
- PVA Application: Apply a liquid Polyvinyl Alcohol (PVA) release agent for an extra layer of insurance against part sticking.
Manual Fiber Layup & Alignment
Carefully place the carbon fiber fabric into the mold. Fabric orientation dictates the structural strength of your final piece.
- Keep it Taut: Avoid pulling the weave out of alignment, which weakens the structure.
- Relief Cuts: Make small cuts in high-curvature areas so the fabric conforms perfectly to complex geometries without bunching.
Fiber Saturation with Wet Layup Epoxy Resin
Proper fiber saturation ensures the fabric and matrix bond as a single high-strength unit.
- Application: Use a brush or roller to apply our specialized wet layup epoxy resin evenly over the fabric.
- Stippling Action: Use a brush application epoxy technique—stippling rather than dragging—to force the resin deep into the carbon weaves without shifting the fibers.
De-airing & Lamination Compaction
Air bubbles are the enemy of structural integrity, leading to micro-cracks and weak spots.
- Paddle Rollers: Run a ribbed bubble-buster roller firmly over the wet laminate to drive out trapped air.
- Consolidation: Press from the center outward to force excess resin to the edges, ensuring a consistent fiber-to-resin ratio.
Curing & Demolding
- Curing: Allow the part to cure at room temperature based on the technical datasheet guidelines. Avoid disturbing the layup during the initial gelling phase.
- Demolding: Once fully hardened, gently drive plastic wedges along the perimeter of the mold to pop the finished composite hand lamination part free without scratching the tooling surface.
Choosing the Right Wet Layup Epoxy Resin
Selecting the right resin system is the most critical decision in a hand layup carbon fiber project. The choice of wet layup epoxy resin directly impacts both the ease of application and the final strength of the composite.
Why Resin Viscosity Matters
In manual fiber layup, resin viscosity dictates how easily the liquid flows through the fabric.
- Too High: The resin is thick, making fiber saturation difficult. This leads to dry spots and trapped air.
- Too Low: The resin runs off vertical surfaces too quickly, leaving the laminate starved.
- The Sweet Spot: A low-to-medium viscosity allows the resin to bleed through multiple layers of carbon fiber with minimal effort, ensuring full wet-out.
Curing Time: Fast vs. Slow Hardeners
Finding the right balance in working time (pot life) prevents wasted material and ruined parts during hand lamination technique applications.
| Hardener Type | Pot Life | Best For | Pros/Cons |
|---|---|---|---|
| Fast Cure | 15–25 Mins | Small parts, quick repairs | Faster demold times; high risk of premature gelling on large tools. |
| Slow Cure | 60–90 Mins | Large, complex layups | Ample time for precise alignment; requires longer wait times before demolding. |
Working Temperature: Room Temp vs. Heat Curing
Most composite hand lamination projects rely on room-temperature cures ($20^circtext{C} – 25^circtext{C}$) for simplicity and low tooling costs. However, if your parts require higher thermal resistance or maximum mechanical strength, transitioning to a post-cure cycle in a dedicated oven cross-links the polymer matrix to its highest potential.
Degassing Performance: Preventing Trapped Air
Air entrapment is the enemy of structural integrity. A high-quality resin formulated for brush application epoxy methods must have excellent self-degassing properties. This means air bubbles introduced during mixing or brushing can easily rise to the surface and pop before the resin begins to gel, drastically reducing interlayer porosity.
Our RW Atelier Hand Layup Specialty Resin
We engineered our proprietary wet layup epoxy resin specifically to solve the real-world challenges of manual fabric wet-out.
Key Advantages of RW Atelier Resin:
- Optimized Surface Tension: Rapidly draws into carbon fiber bundles without aggressive squeegee work.
- Extended Open Time with Crisp Snap Cure: Gives you maximum working time on the tool, then cures reliably without remaining tacky.
- Built-in Air Release Agents: Minimizes the need for intense rolling, protecting delicate weave alignments during layup quality control.
Layup Quality Control: Ensuring Perfection in Every Layer
Keeping a close eye on quality is what separates a structural masterpiece from a failed part. When doing a manual fiber layup, consistency is everything. We track key metrics to ensure every wet layup epoxy resin component meets structural standards.
Checking Fiber Content
The strength of a composite depends on the right fiber-to-resin ratio. Too much resin makes the part brittle and heavy; too little leaves the fabric dry.
- Target Ratio: We aim for a 40:60 or 50:50 fiber-to-resin weight ratio in standard hand lamination.
- Testing Method: We use burnout testing (for fiberglass) or matrix digestion (for carbon fiber) to verify the exact fiber volume fraction after curing.
Controlling Porosity and Air Trapping
Porosity, or microscopic air bubbles, is the enemy of composite strength. High porosity leads to interlaminar shear failure.
- The Cause: Poor wet-out or rushing during the brush application of epoxy.
- The Fix: Use a roller or squeegee firmly from the center outward to force out trapped air.
- Our Standard: We keep porosity levels below 2% for critical parts using high-flow resins that naturally self-deair.
Surface Quality Assessment
A smooth cosmetic finish is essential, especially for raw carbon fiber looks.
- Visual Inspection: We check for pinholes, dry spots, and fabric distorting or bridging in tight mold corners.
- Tactile Check: Feeling the cured surface helps identify subsurface voids that haven’t broken through the top layer.
Troubleshooting Common Defect Solutions
Even with a perfect hand lamination technique, issues can happen. Here is how we troubleshoot and fix the most common defects:
| Defect | Root Cause | Immediate Solution |
|---|---|---|
| Dry Spots / Pale Fabric | Insufficient fiber saturation during layup. | Pre-wet the layup mold preparation surface and roll resin deeper into the weave. |
| Pinholes on Surface | Air trapped against the gel coat or mold surface. | Apply a thin prime coat of resin to the mold before laying down the first layer of fiber. |
| Bridging (Fiber Lifting) | Fabric pulled too tight over sharp radii or corners. | Cut relief slits in non-structural areas or use a radius filler (fillet) before fabric placement. |
| Blistering | Moisture contamination or premature demolding. | Ensure the mold is completely dry and the part fully cures at the correct room temperature. |
Cost Optimization in Hand Layup Carbon Fiber Projects
Balancing your budget while maintaining high performance is the biggest challenge in the wet layup epoxy resin process. To stay competitive in the global composite market, you need to minimize waste, streamline labor, and control material expenses without sacrificing structural integrity.
Precise Resin Consumption Calculation
Getting your fiber-to-resin ratio right is critical for both cost and quality. Too much resin adds unnecessary weight and expense; too little leads to dangerous dry spots.
- Target Ratio: Aim for a 40:60 or 50:50 fiber-to-resin weight ratio for standard manual fiber layup.
- The Formula: Calculate the total weight of your carbon fiber fabric, then multiply it by the target resin percentage (plus a 10-15% margin for mixing cup loss and roller absorption).
- Mixing Practice: Mix in small batches. Brush application epoxy systems have a limited pot life, and mixing too much at once leads to wasted, hardened resin.
Minimizing Material Waste
Carbon fiber and high-quality epoxy resins are expensive inputs. Reducing scrap directly boosts your bottom line.
| Waste Source | Optimization Strategy |
|---|---|
| Fabric Offcuts | Use nesting software or digital templates to maximize ply layout on the roll before cutting. |
| Resin Leftovers | Transition to a “just-in-time” mixing schedule based on the progress of your hand lamination technique. |
| Consumables | Switch to reusable silicone peeling layers instead of single-use release films where production volume allows. |
Improving Labor and Production Efficiency
Because composite hand lamination is labor-intensive, optimizing your workshop workflow is the fastest way to cut operational costs.
- Kitting: Pre-cut all carbon fiber plies, staging them in order of placement before mixing the resin.
- Ergonomic Workstations: Arrange layup mold preparation areas and resin mixing stations close to each other to minimize transit time and prevent premature gelling.
- Standardized Tools: Use specialized grooved rollers to speed up fiber saturation and air removal, reducing the manual hours spent per part.
Balancing Cost and Quality
Maximizing value means knowing where to save money and where to invest. Cutting corners on core materials always costs more in repairs later.
Our Production Rule: Never save money by buying cheap, unverified resins or degraded fiber seconds. True cost optimization comes from reducing process waste, maximizing labor efficiency, and eliminating defects—not from lowering material standards.
Ready to Upgrade Your Hand Layup Carbon Fiber Process?
Get a Free Sample Kit
See the difference in your own shop. Request a free sample of our premium wet layup epoxy resin formulated specifically for manual fiber layup. Test its wetting speed, viscosity, and clarity on your next composite hand lamination project with zero risk.
Schedule a Process Consultation
Struggling with air bubbles, dry spots, or slow production? Talk directly with our tech team. We provide practical layup quality control advice and mold preparation tips to help you streamline your wet layup process and eliminate costly part defects.
Request a Custom Cost Analysis Report
Stop wasting expensive materials. We will analyze your current fiber saturation methods, resin consumption, and cycle times to create a personalized cost vs. quality blueprint. Learn exactly how to minimize waste and boost your shop’s daily output.